Seeded Artisan Bread Dough Recipe
Introduction
Welcome to our delicious seeded artisan bread dough recipe! If you’re a bread lover, this recipe is perfect for you. With a combination of different seeds, this bread is not only tasty but also packed with nutrients. Whether you’re a beginner or an experienced baker, you’ll find this recipe easy to follow and rewarding.
Ingredients
For this seeded artisan bread dough recipe, you’ll need the following ingredients:
Main Dough:
– 500g bread flour
– 350ml lukewarm water
– 1 tablespoon active dry yeast
– 1 tablespoon honey
– 2 tablespoons olive oil
– 2 teaspoons salt
Seed Mix:
– 2 tablespoons flaxseeds
– 2 tablespoons sesame seeds
– 2 tablespoons sunflower seeds
– 2 tablespoons pumpkin seeds
– 2 tablespoons poppy seeds
Steps
Now that you have gathered all the ingredients, let’s start making the seeded artisan bread dough:
Step 1: Mixing the Dough
In a large mixing bowl, combine the bread flour, lukewarm water, yeast, honey, olive oil, and salt. Mix well until a sticky dough forms. You can use a wooden spoon or your hands for this step.
Step 2: Kneading the Dough
Transfer the dough onto a lightly floured surface and knead it for about 10 minutes. This will help develop gluten and give the bread a nice texture. Add more flour if the dough is too sticky, but be careful not to add too much.
Step 3: Adding the Seed Mix
Once the dough is smooth and elastic, flatten it out and sprinkle the seed mix evenly over the surface. Gently fold and knead the dough again to distribute the seeds throughout.
Step 4: Proofing the Dough
Place the dough back into the mixing bowl and cover it with a clean kitchen towel or plastic wrap. Let it rise in a warm, draft-free place for about 1 to 2 hours, or until it doubles in size.
Step 5: Shaping the Dough
After the dough has risen, gently punch it down to release any air bubbles. Transfer it to a lightly floured surface and shape it into a round loaf or any desired shape. Place the shaped dough onto a baking sheet lined with parchment paper.
Step 6: Final Proofing
Cover the shaped dough with a kitchen towel and let it proof for another 30 minutes to 1 hour. This will allow the dough to rise slightly again before baking.
Step 7: Baking
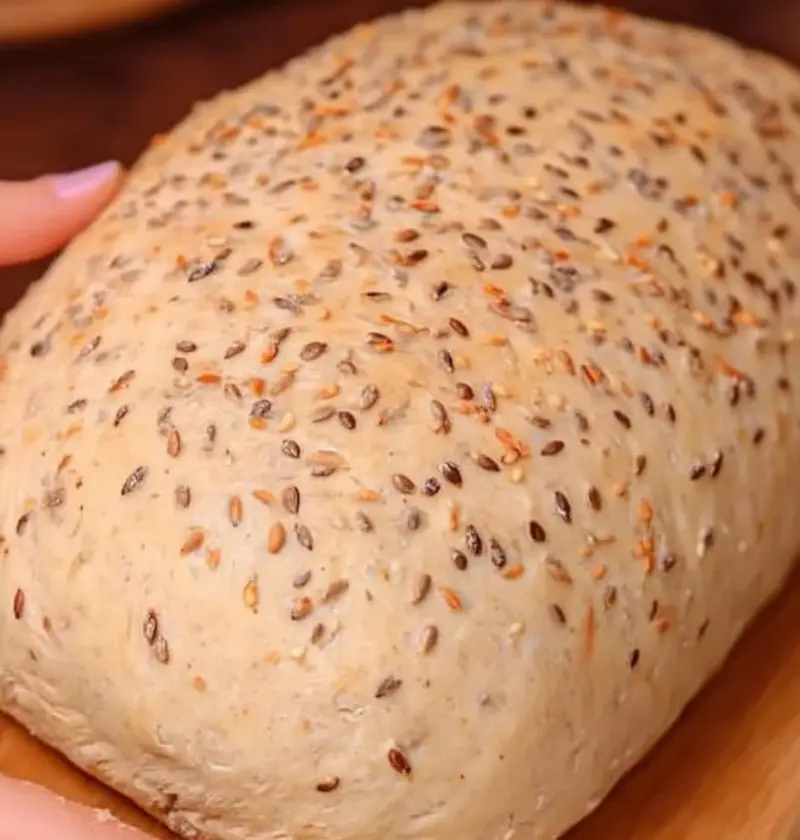
Preheat your oven to 425°F (220°C). Once the dough has finished its final proofing, gently brush the surface with water and sprinkle some extra seeds on top for decoration. Bake the bread for about 30 minutes or until it turns golden brown and sounds hollow when tapped on the bottom.
Variations
Feel free to experiment with different variations of this seeded artisan bread dough recipe. You can add herbs like rosemary or thyme for extra flavor, or even include dried fruits and nuts for a sweet and savory twist. The possibilities are endless!
Tips
Here are some tips to ensure your seeded artisan bread dough turns out perfect:
– Use lukewarm water to activate the yeast. Water that is too hot can kill the yeast, while cold water may hinder the fermentation process.
– Allow enough time for the dough to rise. Patience is key for achieving a light and airy texture.
– Don’t skimp on the seeds. They not only add flavor but also give the bread a beautiful appearance.
– Experiment with different seed combinations to find your favorite mix.
Conclusion
Now that you have mastered the art of making seeded artisan bread dough, you can enjoy freshly baked bread whenever you want. This recipe is versatile and allows you to customize it according to your taste preferences. So go ahead, get baking, and impress your family and friends with your homemade bread!
FAQs
Q: Can I use whole wheat flour instead of bread flour?
A: While whole wheat flour can be used, it will result in a denser bread. Bread flour gives the bread a lighter texture and better rise.
Q: Can I freeze the dough?
A: Yes, you can freeze the dough after the first rise. Simply shape the dough into a ball, wrap it tightly in plastic wrap, and place it in the freezer. When ready to bake, allow the dough to thaw and rise again before baking.
Q: How long does the bread stay fresh?
A: The bread is best enjoyed within the first two days of baking. To keep it fresh for longer, store it in an airtight container or wrap it tightly in plastic wrap.


