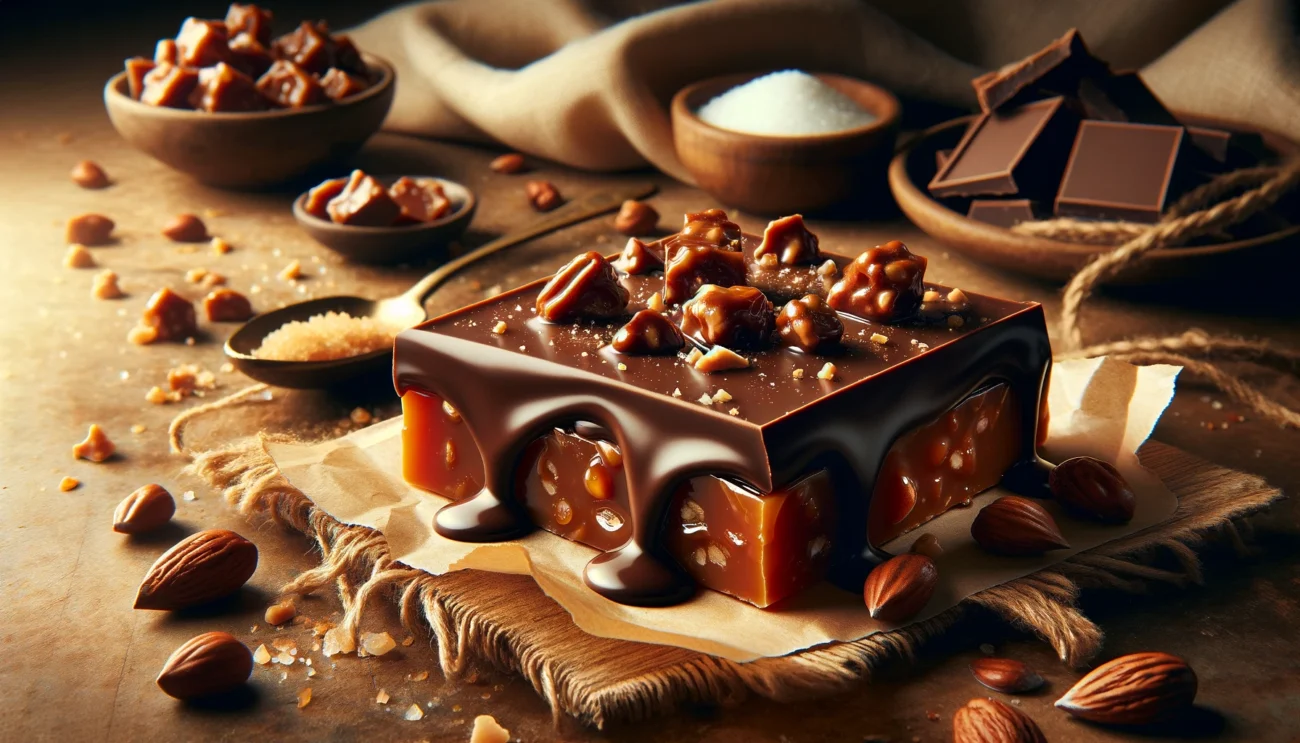
Creating toffee covered in chocolate is a delightful journey into the world of homemade candies, combining the crunchy, buttery sweetness of toffee with the rich, melting pleasure of chocolate. This treat is a perfect balance of textures and flavors, sure to satisfy any sweet tooth. Let’s dive into a comprehensive guide that not only walks you through the creation process but also shares essential tips, potential pitfalls to avoid, and answers to frequently asked questions, ensuring your confectionary adventure is both successful and enjoyable.
Ingredients
- 1 cup unsalted butter
- 1 cup granulated sugar
- 1/2 teaspoon vanilla extract
- 1/4 teaspoon salt
- 1 cup dark chocolate chips or a chopped chocolate bar
- 1/2 cup chopped nuts (almonds, pecans, or walnuts), toasted (optional)
Equipment
- Heavy-bottomed saucepan
- Candy thermometer
- Baking sheet
- Parchment paper
Instructions
- Preparation: Line a baking sheet with parchment paper. If using nuts, toast them lightly in a pan or oven and set aside.
- Cook the Toffee: In a heavy-bottomed saucepan, melt the butter over medium heat. Add the sugar, vanilla extract, and salt. Stir constantly with a wooden spoon or heat-resistant spatula until the mixture becomes a deep amber color and reaches 300°F (150°C) on a candy thermometer, indicating the hard-crack stage.
- Spread the Toffee: Immediately pour the hot toffee onto the prepared baking sheet, spreading it into an even layer with a spatula. Allow it to cool slightly until it sets but is still warm.
- Add Chocolate: Sprinkle the chocolate chips evenly over the warm toffee. The heat from the toffee will melt the chocolate. After a few minutes, spread the melted chocolate into a smooth layer with a spatula.
- Add Nuts (Optional): Sprinkle the toasted nuts over the melted chocolate. Gently press them into the chocolate layer.
- Cool: Let the toffee sit at room temperature until completely cooled and the chocolate has set. This may take several hours. For quicker setting, you can refrigerate it for about 30 minutes.
- Break into Pieces: Once set, break the toffee into irregular pieces using a knife or by hand.
Tips for Success
- Consistent Heat: Keep the heat medium to avoid burning the sugar. A heavy-bottomed pan distributes heat evenly, reducing the risk of hot spots.
- Candy Thermometer: Use a candy thermometer to ensure the toffee reaches the correct temperature. This precision is crucial for achieving the perfect texture.
- Quality Ingredients: High-quality butter and chocolate make a significant difference in the taste and texture of your toffee.
What to Avoid When Making Chocolate-Covered Toffee
Creating the perfect batch of chocolate-covered toffee is an art that requires attention to detail. While the process brings joy and a sense of accomplishment, there are pitfalls that can affect the outcome of your confectionery creation. Here are some key points to keep in mind to ensure your toffee and chocolate coating turn out impeccably:
- Overcooking the Toffee: The fine line between perfectly cooked toffee and a burnt mess is thin. Overcooking can result in a bitter taste and an overly hard texture that’s difficult to bite into. Use a reliable candy thermometer and watch for the toffee to reach the hard-crack stage (300°F to 310°F), removing it from the heat immediately.
- Undercooking the Toffee: Just as detrimental as overcooking, undercooking your toffee can lead to a chewy, sticky consistency that doesn’t set properly. Ensure it reaches the correct temperature for that signature snap.
- Moisture on Utensils or Pans: Any moisture can cause the chocolate to seize, turning it from a smooth, glossy coating to a grainy mess. Ensure all utensils, pans, and surfaces are completely dry before beginning your toffee and chocolate preparation.
- Rushing the Cooling Process: Patience is key when allowing the toffee and chocolate to set. Rushing this process by not allowing enough time for cooling can result in a soft set or a chocolate layer that doesn’t properly adhere to the toffee base.
- Using Low-Quality Chocolate: The quality of chocolate can make or break your chocolate-covered toffee. Using low-quality chocolate can result in a waxy texture and lackluster taste. Opt for high-quality chocolate, which melts smoothly and complements the rich flavor of the toffee.
- Neglecting to Toast the Nuts: If you’re adding nuts, toasting them beforehand is a step you shouldn’t skip. Untoasted nuts can taste raw and may introduce unwanted moisture to the chocolate layer. Toasting enhances their flavor and adds an extra crunch.
- Ignoring Temperature and Humidity: Making toffee in high humidity or when your kitchen is particularly warm can affect how well the toffee and chocolate set. Aim for a cool, dry day or adjust the temperature of your kitchen if possible.
FAQs
Q: Can I use milk chocolate instead of dark chocolate?
A: Absolutely! The choice of chocolate depends on personal preference. Milk chocolate will give a sweeter, creamier finish.
Q: How do I store the toffee?
A: Store the toffee in an airtight container at room temperature for up to 2 weeks. Avoid refrigerating as it can cause the toffee to soften.
Q: What if I don’t have a candy thermometer?
A: The hard-crack stage can also be tested by dropping a small amount of toffee into cold water. It should form hard, brittle threads that break easily.
Creating toffee covered in chocolate is a rewarding experience that combines the joy of cooking with the pleasure of indulging in a homemade treat. With the right ingredients, a bit of patience, and attention to detail, you can master this classic confection and enjoy or share a deliciously crunchy, chocolaty delight.